

INTRODUCTION
As everyone knows PixInsight is a formidable tool for deep sky astrophotograpy processing: it gives to the imager a lot of tools that goes from preprocessing to the final touch on any astronomical picture.
Less knows that PixInsight is a powerful tool for planetary processing too.
Unfortunately PI doesn't have specific tools for planetary and lunar preprocessing like image quality estimation and frame registration, even if, in some cases, StarAlignment process can be used ( read Zenithal Color Moon in PI forum), but usually with high turbolence - low contrast moon images StarAlignment doesn't works properly.
This is why I choose to align and stack frames with a different tool: AviStack 2.00
The data set
The data set consists of 31 movies of 400 frames captured with a Lumenera SkyNix 2-1C color camera connected to my Celestron C 9.25 on a 10Micron GM1000 HPS German mount on the evening of June 11th 2014, from my garden in Castenedolo.
Each capture has been preprocessed in AviStack 2.00, stacking the best 150 frames using the batch processing feature of the software and saving the result in 16 bit TIFFS.
Unfortunately the atmosphere was very turbulent so the stacked images suffers of low contrast and low resolution.
Creating the mosaic
In PI the best tool for seamless mosaic creation is GradientMergeMosaic; to work properly this tool requires images previously aligned but, as said before, StarAlignment cannot handle properly my low contrast lunar images, so I need to use a trick:
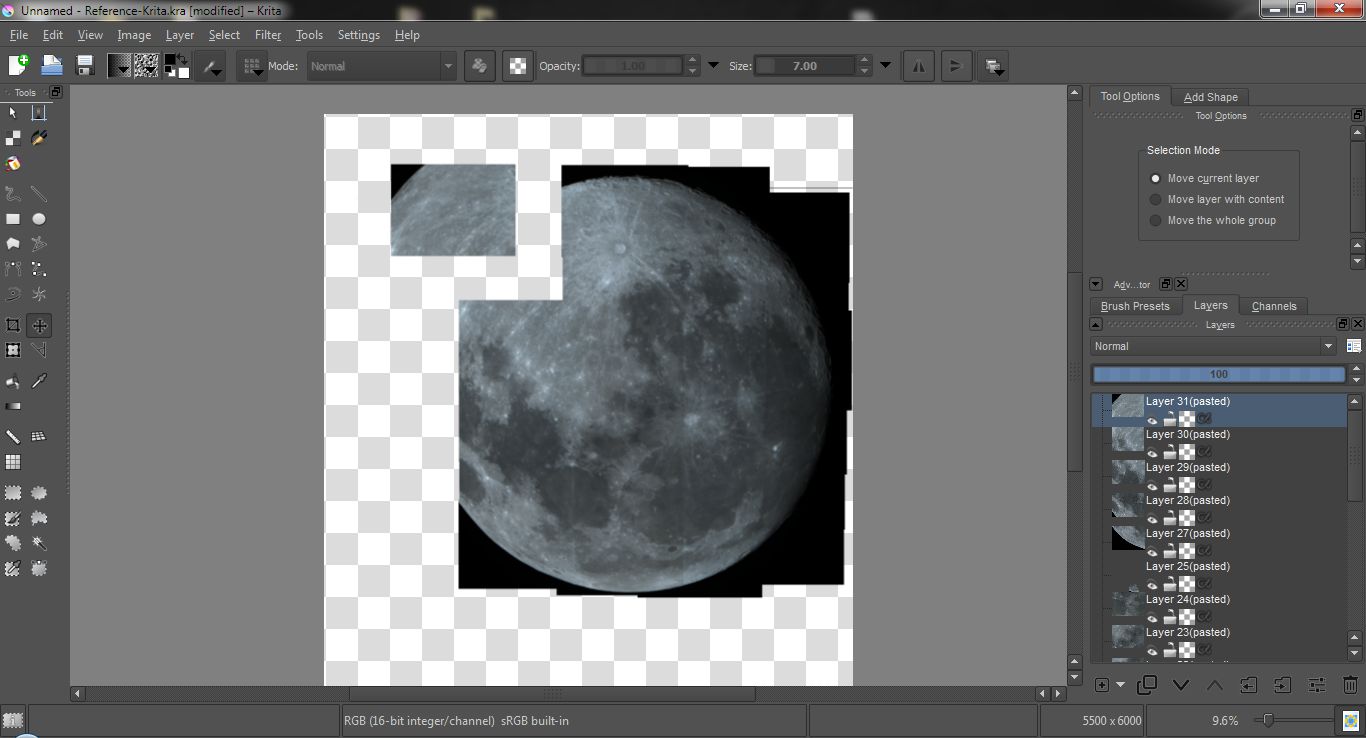
I create a "reference frame" putting together the single tiles with a graphic editor aligning the frames manually and saving the flattened image.
For this task I use Krita a freeware software that supports image file formats 16 bits per channel.
This intermediate mosaic is far from seamless because of different illumination and hue of the single frames due to the varying moon height and small difference in camera behaviour.
Once saved the flattened image in 16 bit TIFF format it's time to fire up PixInsight.
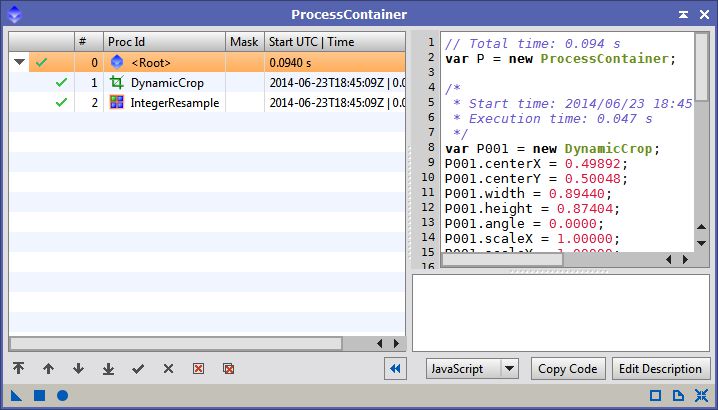
The very first thing to do is cropping each image to get rid of the timestamp printed on the border: this can be done with DynamicCrop process.
The evening of the data capture was very turbulent so I choose to resample the image by a factor of two using IntegerResample process.
Doing this on a lot of frames could be very time consuming, but PI allows to do this using a batch process:
First I create the process icons for DynamicCrop and IntegerResample then I put them together with ProcessContainer.
Using ImageContainer I load the list of images to process an save its process icon.
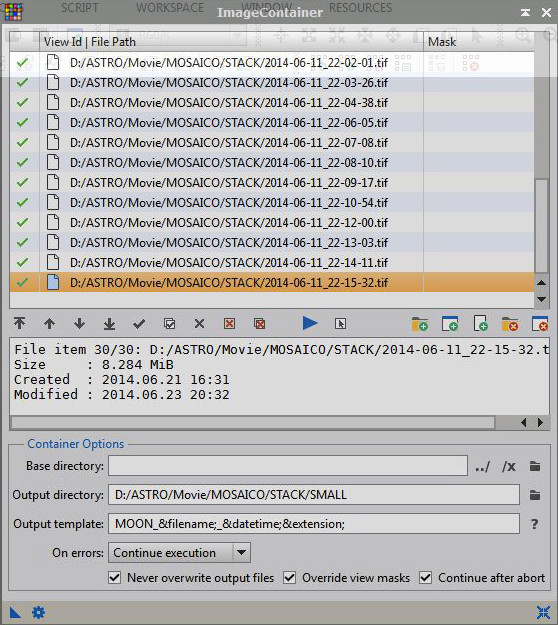
Finally I apply the process dragging the process icon of the ProcessContainer over the pocess icon of the ImageContainer: PI applies DynamicCrop and IntegerResample to all the images in the list and saves the result in the destination folder.
It's now time to prepare the each tile for the final montage:
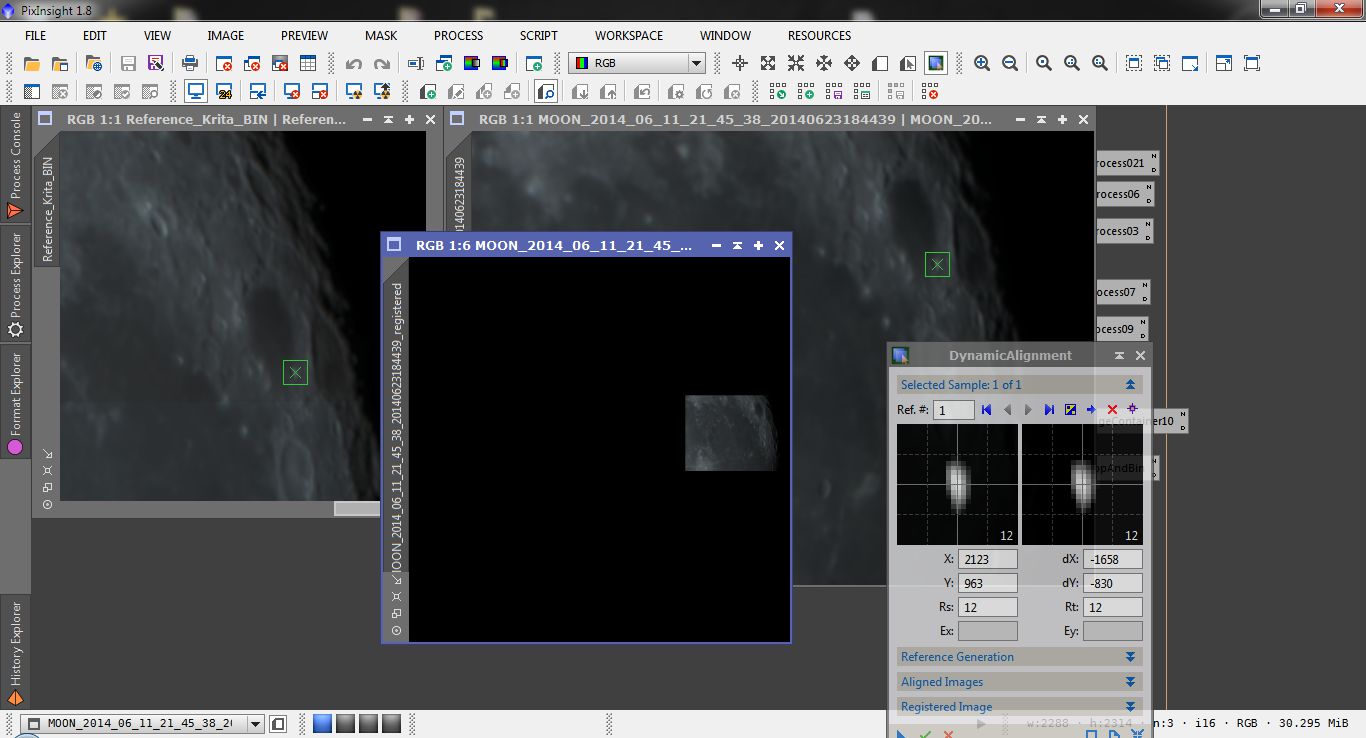
I open the reference moon first and, using IntegerResample I bin down in by a factor of two (like on the single tiles), then I align each single frame using DynamicAlignment process: since I only need a simple traslation only one align point is enought: I select a bright starlike feature (like a small craterlet rim) on the reference image first and then the corresponding feature on the single tile.
Usually DynamicAlignment will miss the target on the second image at first, so I have to reposition it dragging the green square by hand: when done push the "green v" button to align the image.
I've repeated the procedure on every image saving it in a new folder.
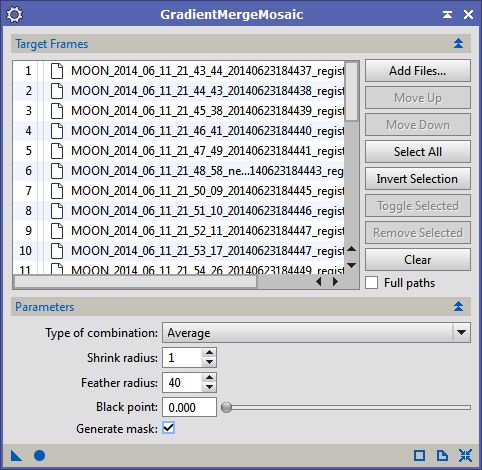
When finished I open the GradientMergeMosaic process and load the list of all the registered images, finally I press the "circle" button that execute the process.
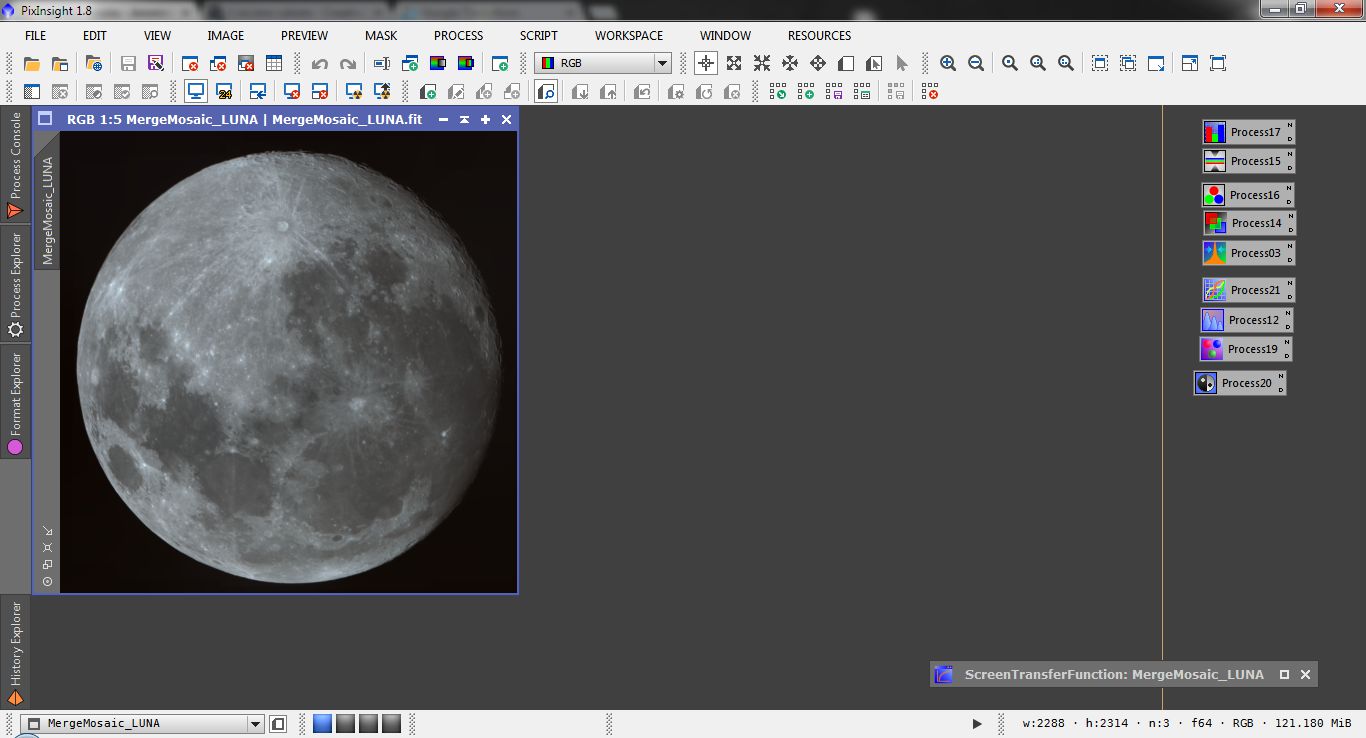
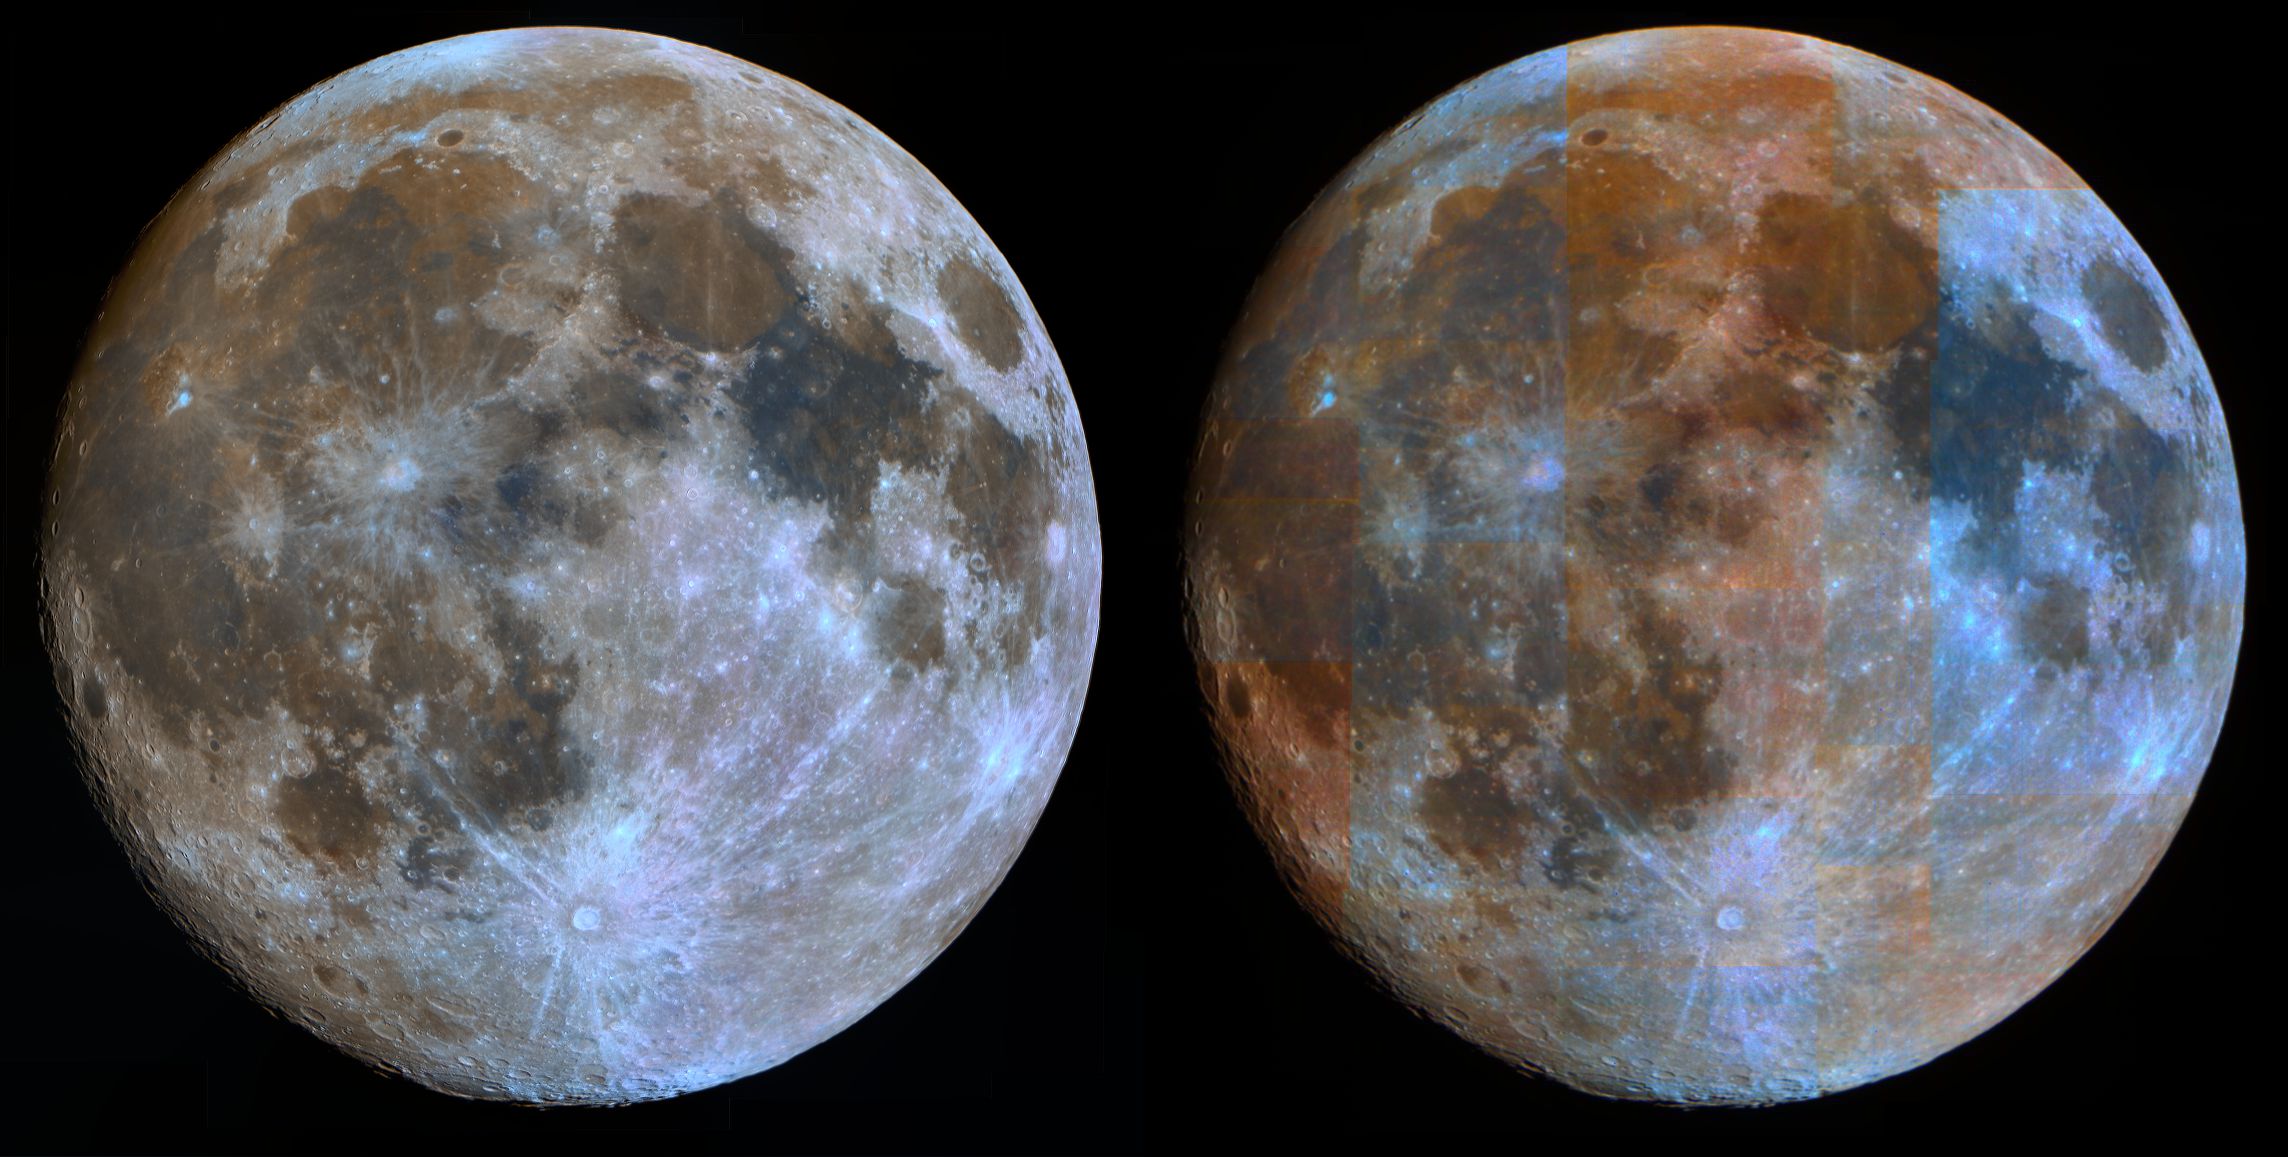
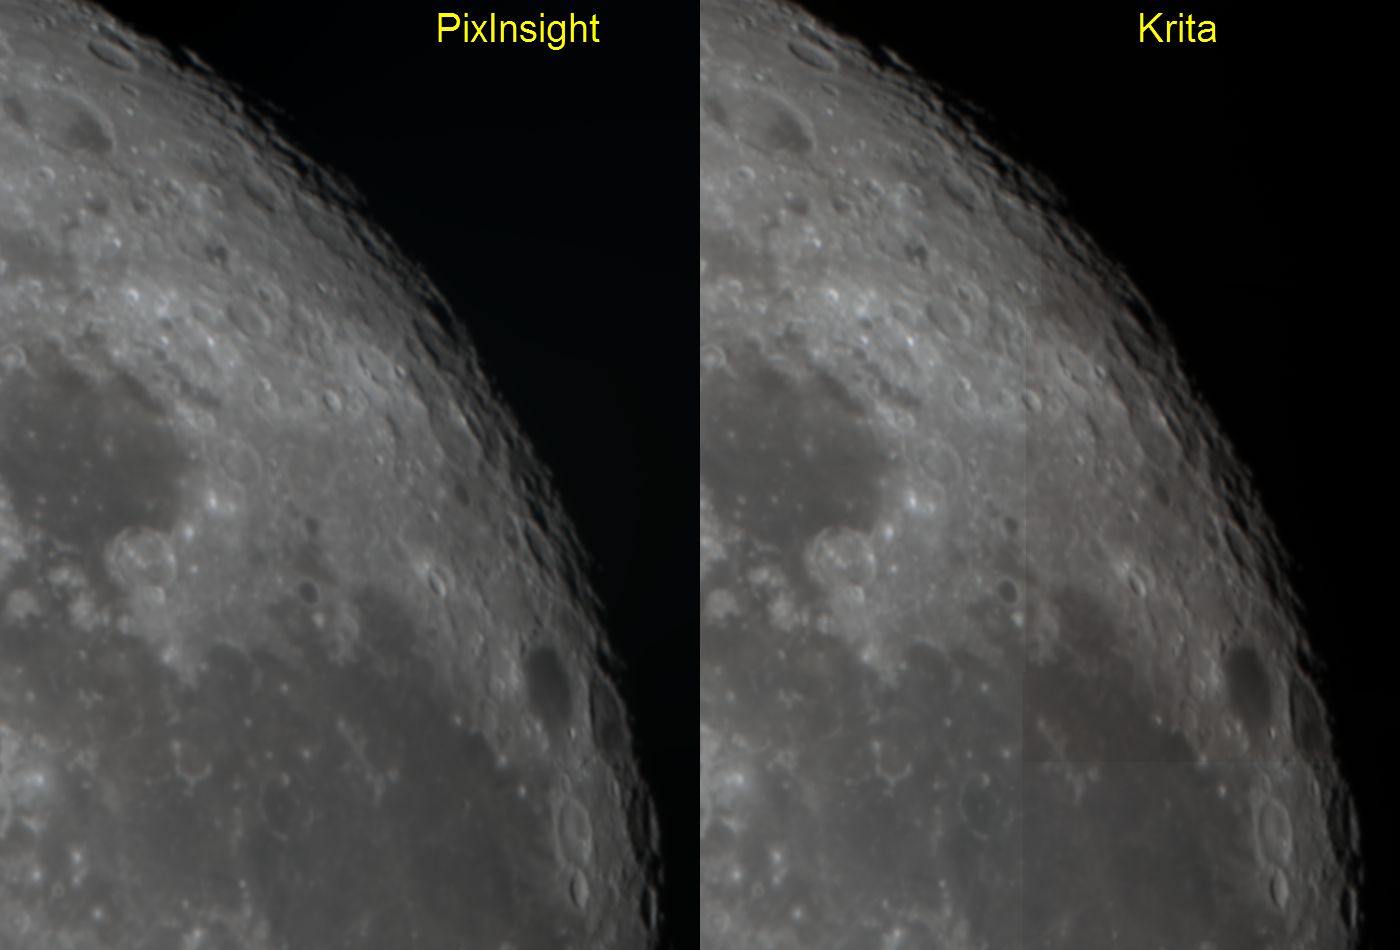
After a few minutes the mosaic is shown in the workspace: in the following image you ca see a comparision between Krita and PixInsight mosaic.
Color Balancing
Since my image was obtained with an RGB camera it is very important to color balance before further processing.
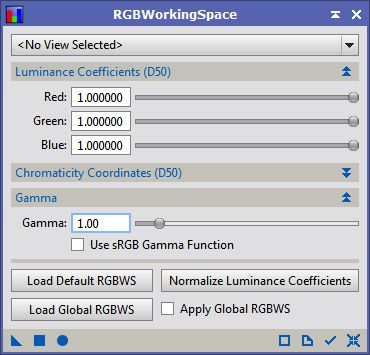
The first step is changing the RGB working space to have a uniform linear luminance: set the luminance coefficent all on 1, then set the Gamma value on 1 (this will make the luminance linear for deconvolution purposes)
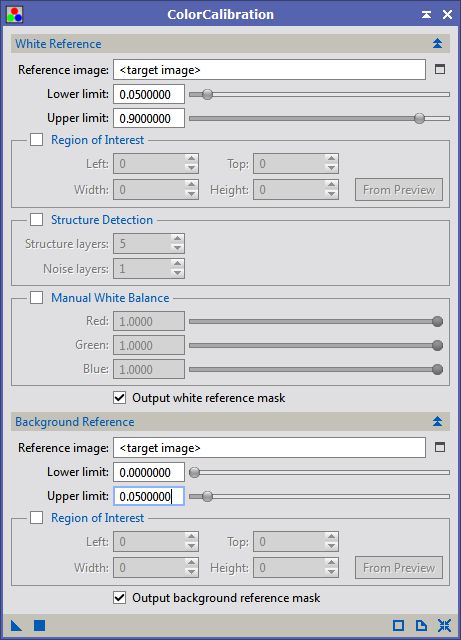
Neutralize the background
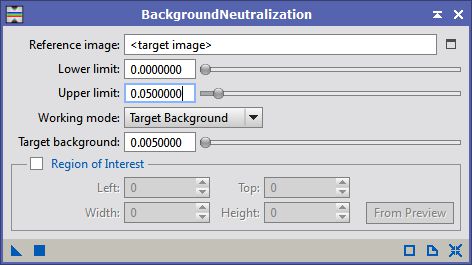
Color balance disabling structure detectionio and using the whole moon disk as the white reference.
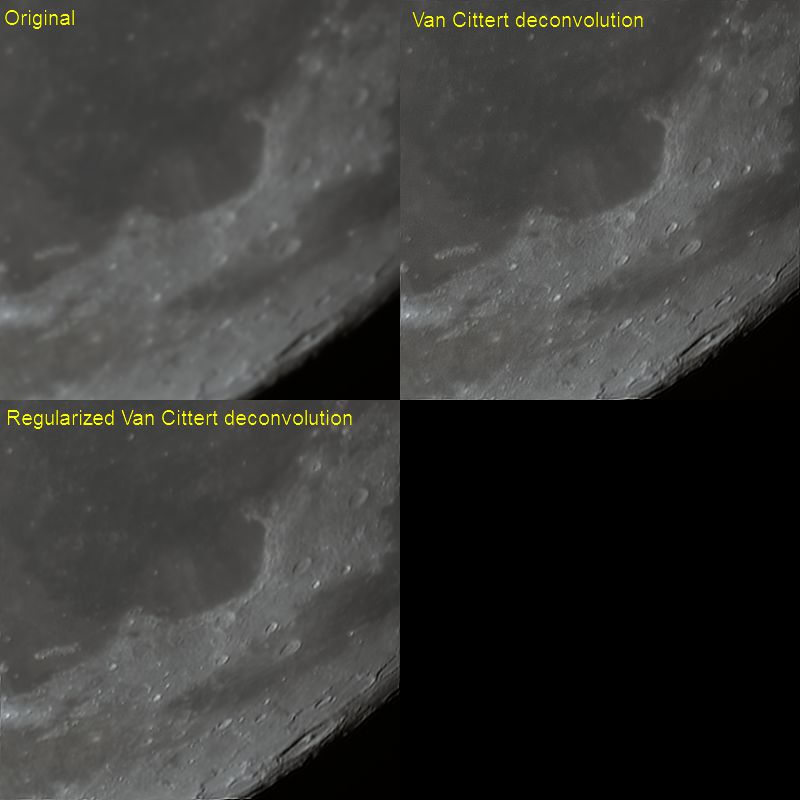
Dealing with turbulence
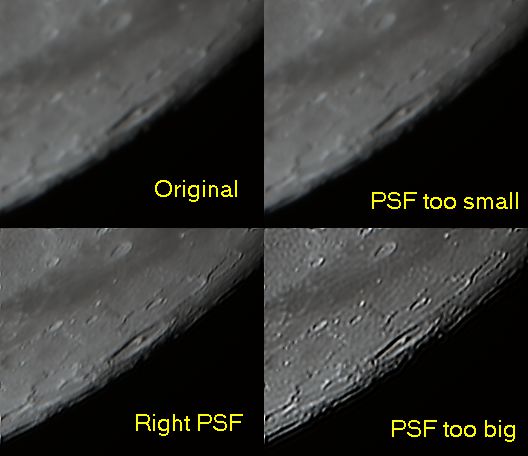
The main effect of the turbulence on astrophotography is smearing the details giving to the image an "unfocused" appearance.
In technical language this means that the point spread function (PSF) of the optical system is much larger then the theoretical one.
This problem can be partially solved usin a powerful PI tool: Deconvolution.
PI includes different Deconvolution algorithm, in my opinion the best one, for planetary, imaging is the Regularized Van Cittert.
On deep sky images the PSF can be measured analizing a few unsaturated stars in the image, but with planetary imaging the only way to set the PSF is with trial and errors, changing the stdDev parameter.
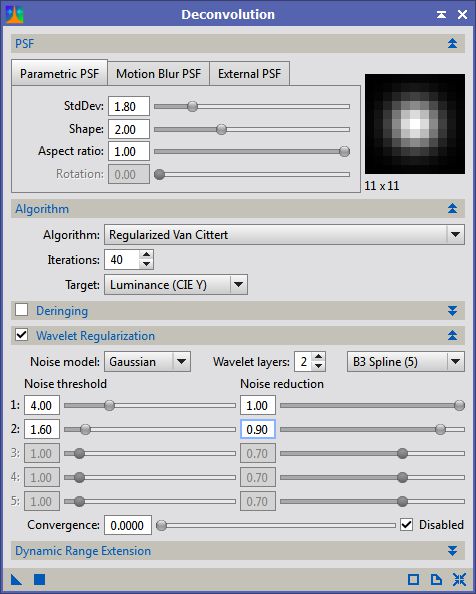
Regularized Van Cittert algorithm tends to produce noisy results so it is very important to set properly the regularization parameters.
Here the parameter set used for deconvolving this image
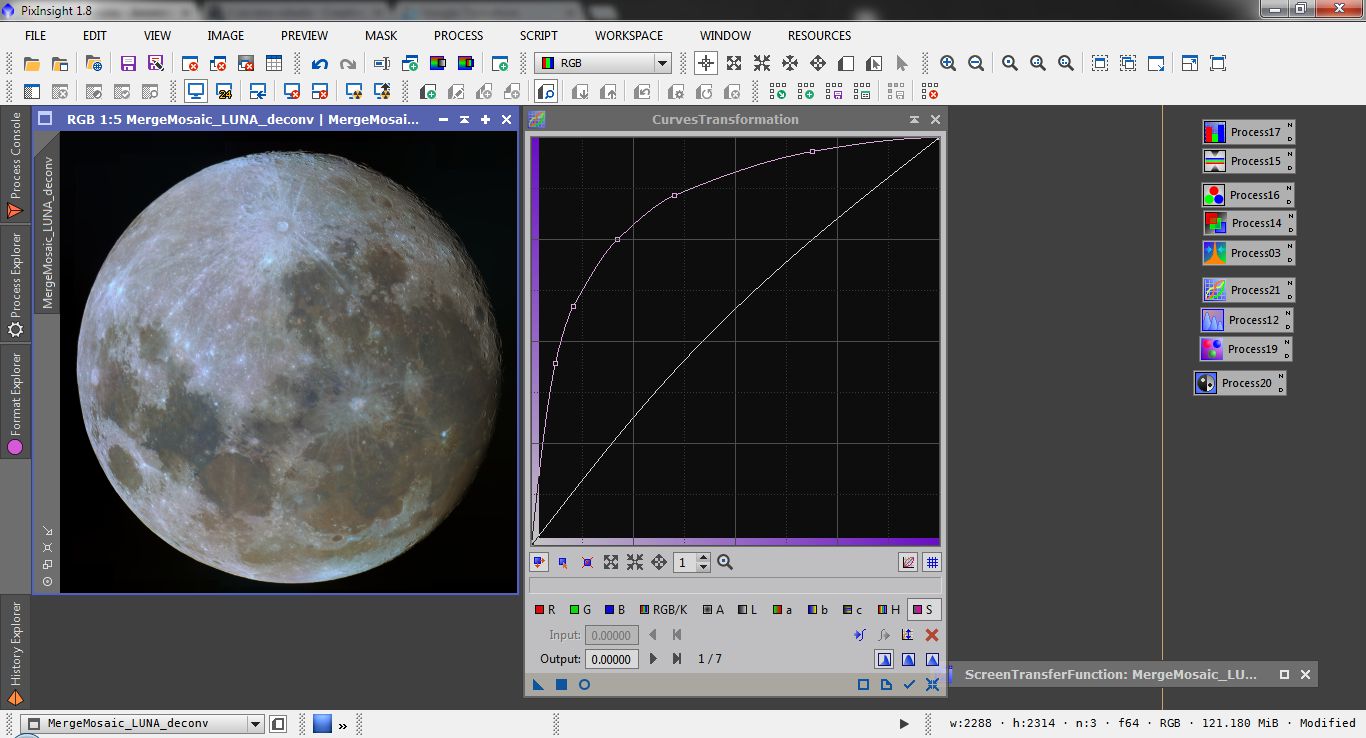
Giving some life to the moon surface
Despite what most people think, the Moon surface isn't completely grey: the color are only dificult to see because the have a very low saturation.
PI CurvesTransformation process allows changing the transfert curves of the image in different channels: among them the saturation channel.
Tracing a saturation curve very steep on the left side of the histogram will boost saturation in the low saturation areas, without overboosting the already colored parts (for example for the differential atmospheric refracion in the very bright spots).
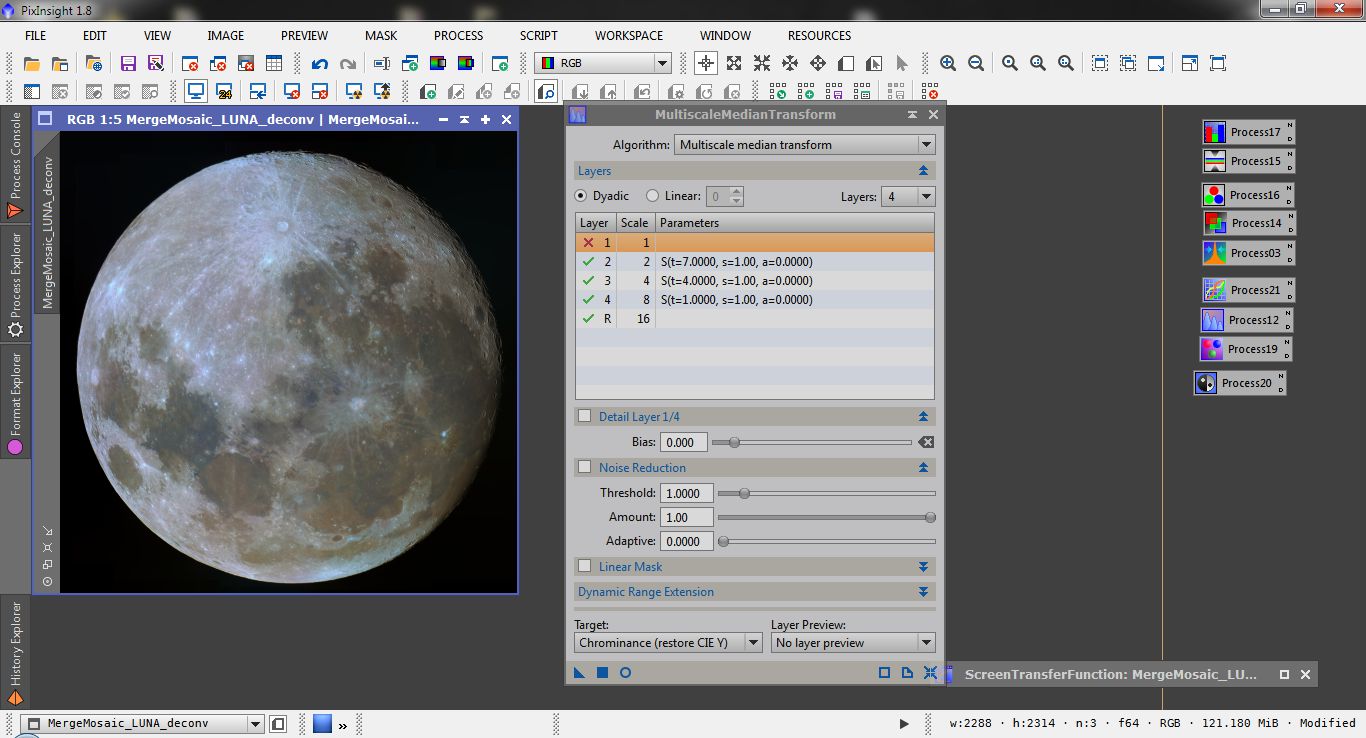
After this step a litte bit of noise could arise in chrominance channel, if it happens it is possible to apply a denoising process only in the chrominance.
MultiscaleMedianTransform allows to process separately the luminance and the chominance channes of the image:
note in the following image that the chrominance Target was selected.
After the saturation boost, it may have been a slight greenish tint that can be corrected simply by SCNR process.
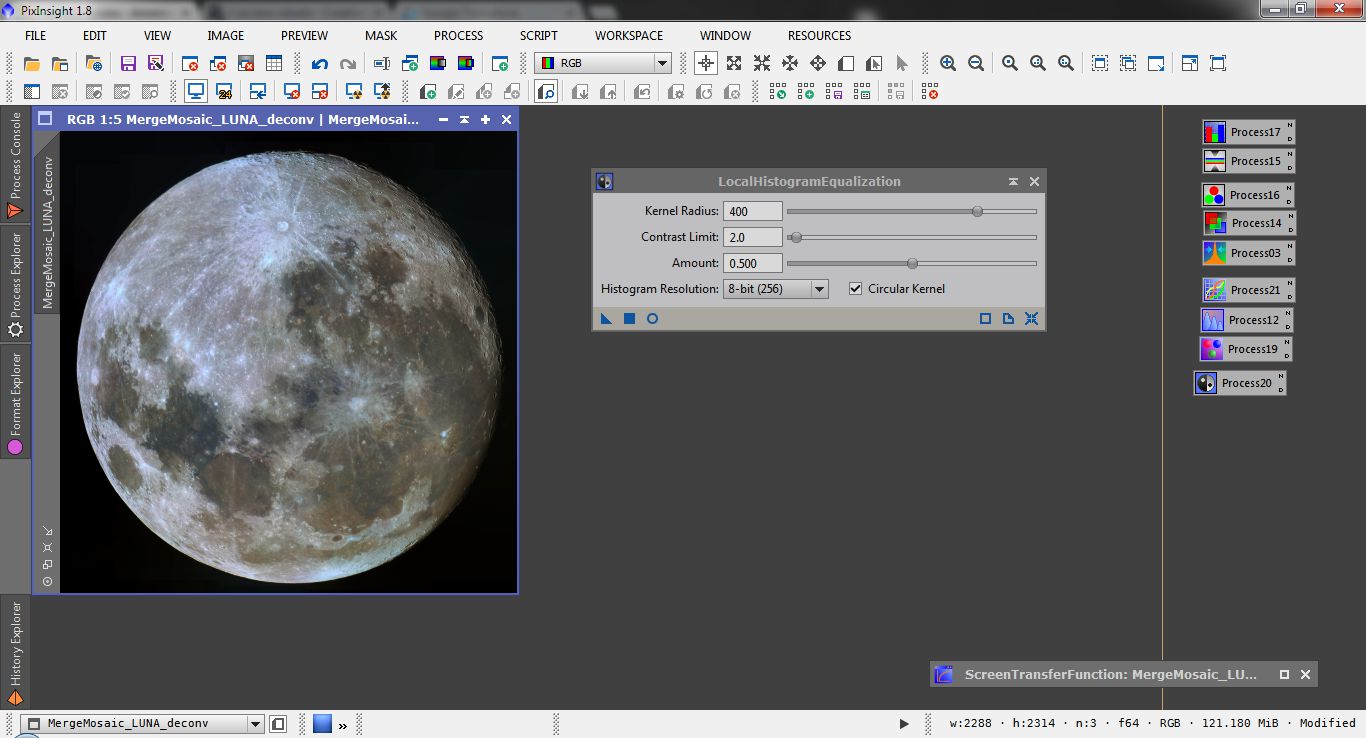
Finally I want to increase the large scale contrast of the image; to do this I use the LocalHistogramEqualization tool with a quite large kernel radius (400 pixel).
Since the effect is very strong I lowered to 0.5 the Amount: this blends 50% of the processed image with the original one.
Here a side by side comparision between the mosaic composed in PixInsight and that composed in Krita processed in the same way: the difference is amazing and demonstrat how well GradientMergeMosaic works.